0%

【翻譯】嘗試透過貼圖建立 Sticker-Driven Conversations 的 Chatbot

翻譯來自泰國的 Tan 的文章

大家好,我希望 2021 年對每個人來說都是美好的一年 😃,本次會分享一篇對於有在開發 LINE Chatbot 朋友相關的有趣文章。

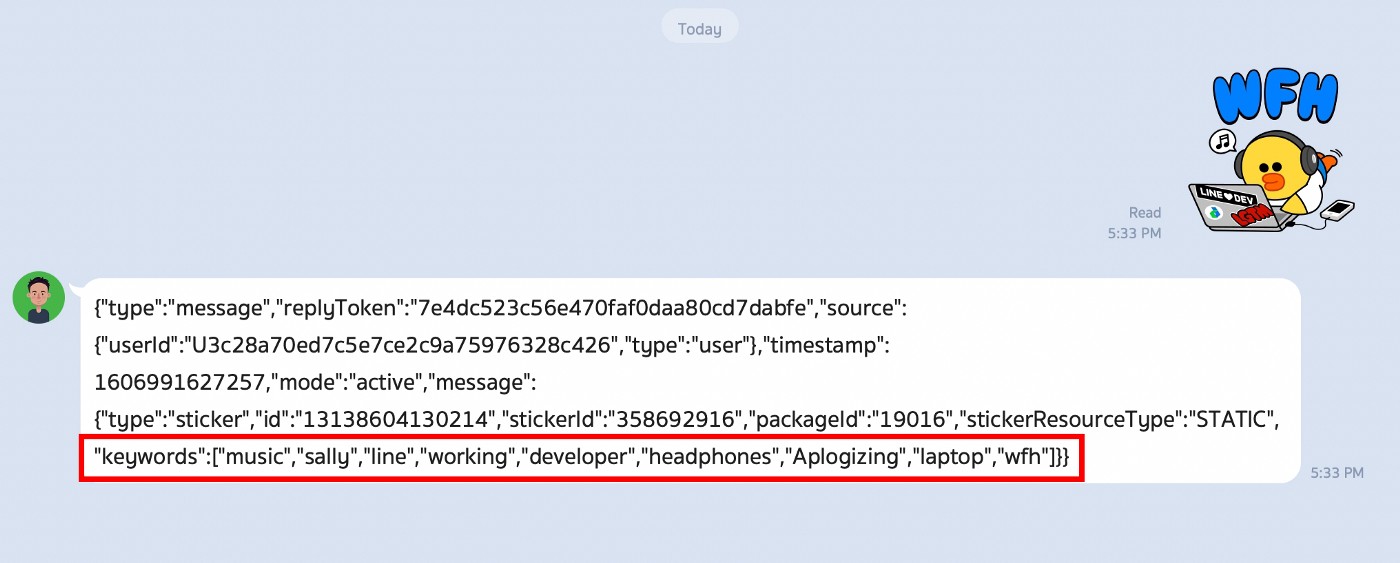
12 月時,LINE 更新了 Messaging API 的新功能(新聞連結),方法是當用戶將貼圖發送給 Chatbot 時,將會從 Webhook 的 keywords 中找到貼圖的關鍵字訊息。

關鍵字的效果如何?

以前,當用戶發送的貼圖給我們時,從中只能拿到 stickerIdpackageId,很難使用它做其他的用途,也因此我們無法理解使用貼圖時的上下文為何。

但如今增加了 keywords 這個欄位,它將幫助我們透過 貼圖(Sticker) 更好地去理解其中含意,了解用戶的意圖與感受(WoW!)

注意:keywords 欄位最多將只能擁有 15 個關鍵字,並且排序為隨機

透過 Sticker 與您的 BMI Chatbot(Dialogflow)對話。

我將在本文中做的是開發給 Jirawatee 使用的 BMI Chatbot,Jirawatee希望 Chatbot 透過 Sticker 了解他的需求(Intent),讓他能更方便的使用。但眾所周知,Dialogflow 僅支援文字類型,因此我們必須先創建一個 Proxy 幫忙轉譯,然後再將訊息轉發給 Dialogflow。

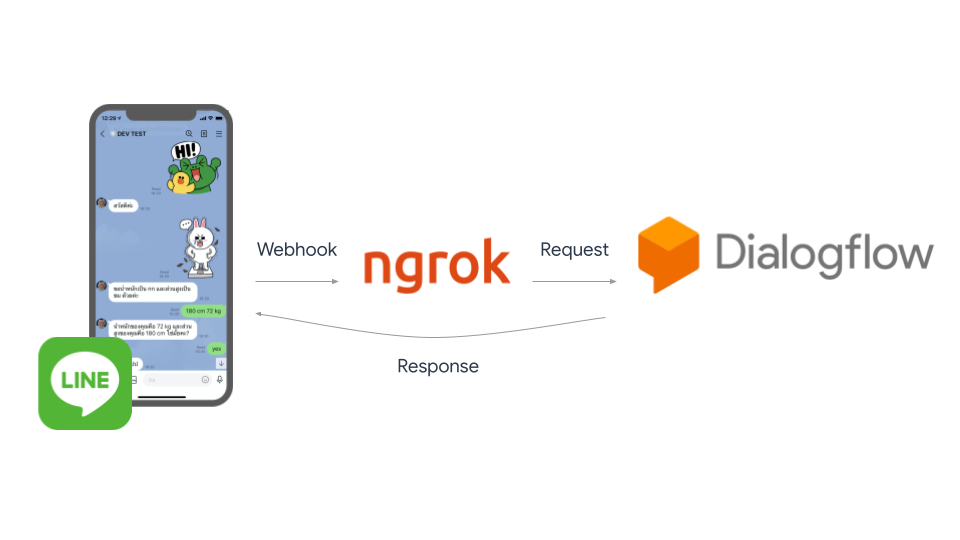
由於本篇是屬於半實驗性的開發,因此我將透過 ngrok,將其作為 Local Server,並使用 Node.js 進行開發。主要步驟如下:

  1. 建立 LINE Official Account (Chatbot)
  2. 使用 Dialogflow 建構 BMI Chatbot
  3. 建立 Proxy Server
  4. 啟用 ngrok
  5. 將 Chatbot 收集到的詞彙添加到 Dialogflow 做訓練

1. 建立 LINE Official Account (Chatbot)

如果您以前沒有建立過 LINE Chatbot,則可以查看 Jirawatee 的這篇文章(泰文)。若你已經有帳號了,直接跳到下一小節。

中文版的建立流程可以參考 - LINE 開發社群計畫: Chatbot 台中小聚 08 – LINE platform 工作坊紀錄

2. 使用 Dialogflow 建構 BMI Chatbot

如前面 Jirawatee 建議的那樣,我們需要一隻 BMI Chatbot,想了解實作細節可以參考此篇(泰文):如何透過 BMI Bot 將 LINE Bot、Dialogflow 和 Firebase 結合

3. 建立 Proxy Server

此步驟是使用 Node.js 撰寫一個 Web app,用來接收用戶向我們的 Chatbot 發送訊息時 LINE 發送回來的 Webhook,然後我們將從 Webhook 中 找出 keywords 欄位並轉發到 Dialogflow

{
"destination": "xxxxxxxxxx",
"events": [
{
"replyToken": "nHuyWiB7yP5Zw52FIkcQobQuGDXCTA",
"type": "message",
"mode": "active",
"timestamp": 1462629479859,
"source": {
"type": "user",
"userId": "U4af4980629..."
},
"message": {
"type": "sticker",
"id": "1501597916",
"stickerId": "52002738",
"packageId": "11537",
"stickerResourceType": "ANIMATION",
"keywords": ["cony","sally","Staring","hi","whatsup","line","howdy","HEY","Peeking","wave","peek","Hello","yo","greetings"]
}
}
]
}
view raw example.json hosted with ❤ by GitHub

創建新 Text 類型的原則是:

  • Body:我們必須將 Sticker 類型轉換為 Text 類型的文字,以便 Dialogflow 能夠理解它。而實際上,我們也可以將其所有關鍵字發送過去。但是,如果仔細看,關鍵字的含義非常廣泛(例如:cony、sally、line.. 等等),可能會使 Dialogflow 難以解釋 Intent,因此我嘗試僅發送 3 個隨機關鍵字給 Dialogflow。
1
2
3
4
5
6
7
8
9
let keywords = event.message.keywords;
let stickerIntent = "";
for (var i = 0; i <= 2; i++) {
stickerIntent += randomItem(keywords) + " ";
}
...
function randomItem(items) {
return items[Math.floor(Math.random() * items.length)];
}
  • Headers:我們在轉發到 Dialogflow 之前,需將 “x-line-signature” 和 “hosts” 一起使用,而 ‘content-length’ 也是需要注意的部分,因此也需要將 Body 加入其中。
1
2
3
4
5
6
7
req.headers['x-line-signature'] = crypto
.createHmac('SHA256', LINE_CHANNEL_SECRET)
.update(body)
.digest('base64')
.toString();
req.headers.host = 'dialogflow.cloud.google.com';
req.headers['content-length'] = Buffer.byteLength(body, 'utf8');

接著開始嘗試轉發到 Dialogflow 上,但 Dialogflow 都沒有連接成功。一直在原地轉圈圈 🥺。之後,我來諮詢 Jirawatee,討論了許久時間,我們發現需要修復’content-length’ 即可…

index.js 的所有程式碼

const express = require("express");
const bodyParser = require("body-parser");
const crypto = require('crypto');
const request = require("request-promise");
const LINE_MESSAGING_API = 'https://api.line.me/v2/bot/message';
const LINE_CHANNEL_SECRET = 'XXXXXXXXXXXXX';
const LINE_HEADER = {
'Content-Type': 'application/json',
'Authorization': `Bearer XXXXXXXXXXXXXXXXXXX`
};
const app = express();
app.use(bodyParser.json());
app.listen(3000, () => {
console.log(`Server available on port 3000`);
});
app.post("/webhook", async (req, res) => {
const body = JSON.stringify(req.body);
const signature = crypto.createHmac('SHA256', LINE_CHANNEL_SECRET).update(body).digest('base64').toString();
if (signature !== req.headers['x-line-signature']) {
return res.status(401).send('Unauthorized');
}
let event = req.body.events[0];
if (event.type === 'message' && event.message.type === 'sticker') {
let keywords = event.message.keywords;
let stickerIntent = "";
for (let i = 0; i <= 2; i++) {
stickerIntent += randomItem(keywords) + " ";
}
const newBody = {
destination: req.body.destination,
events: [{
timestamp: req.body.events[0].timestamp,
mode: req.body.events[0].mode,
source: req.body.events[0].source,
replyToken: req.body.events[0].replyToken,
type: 'message',
message: { type: 'text', id: req.body.events[0].message.id, text: stickerIntent }
}]
};
req.body = newBody;
req.headers["x-line-signature"] = crypto.createHmac('SHA256', LINE_CHANNEL_SECRET).update(JSON.stringify(newBody)).digest('base64').toString();
req.headers["content-length"] = Buffer.byteLength(JSON.stringify(newBody), 'utf8')
postToDialogflow(req);
} else if (event.type === 'message' && event.message.type === 'text') {
postToDialogflow(req);
} else {
reply(req);
}
return res.status(200).send(req.method);
});
function randomItem(items) {
return items[Math.floor(Math.random() * items.length)];
}
const postToDialogflow = req => {
const body = JSON.stringify(req.body);
req.headers.host = "dialogflow.cloud.google.com";
return request.post({
uri: "https://dialogflow.cloud.google.com/v1/integrations/line/webhook/xxxxxx-xxxxxxxx",
headers: req.headers,
body: body
});
};
const reply = req => {
return request.post({
uri: `${LINE_MESSAGING_API}/reply`,
headers: LINE_HEADER,
body: JSON.stringify({
replyToken: req.body.events[0].replyToken,
messages: [
{
type: "text",
text: "Sorry, this chatbot did not support message type " + req.body.events[0].message.type
}
]
})
});
};
view raw index.js hosted with ❤ by GitHub

4. 啟用 ngrok

對於以前從未使用過 ngrok 的朋友,我們建議您閱讀這篇文章(泰文),可以讓我們在 3000 port 下啟用 ngrok!

1
ngrok http 3000

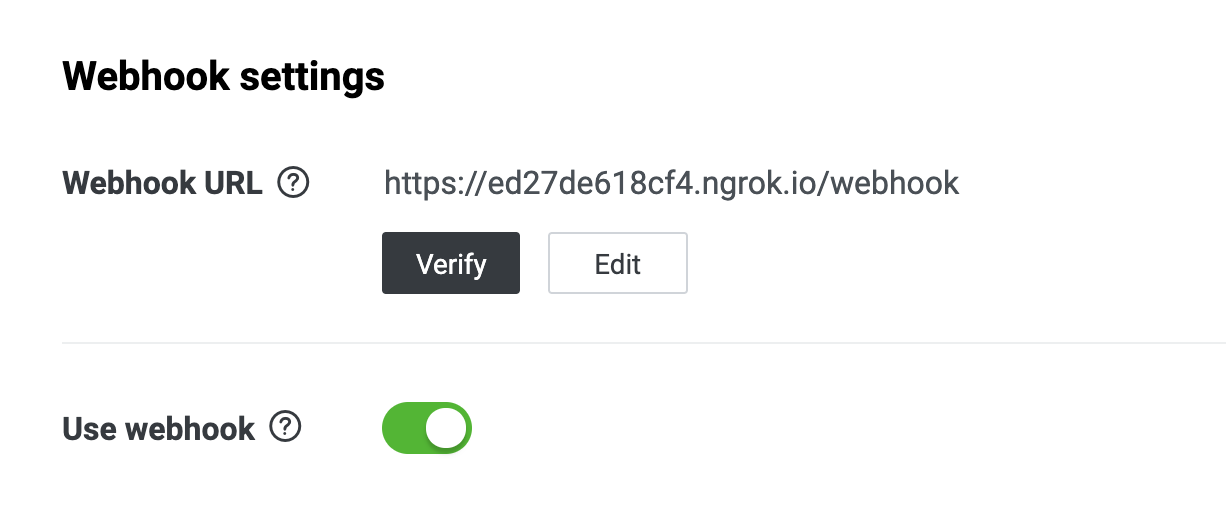
像過往一樣,從 ngrok 獲取 URL 後,在網址後面添加 /webhook 並放入我們的 Chatbot Channel 當中。

5. 將 Chatbot 收集到的詞彙添加到 Dialogflow 做訓練

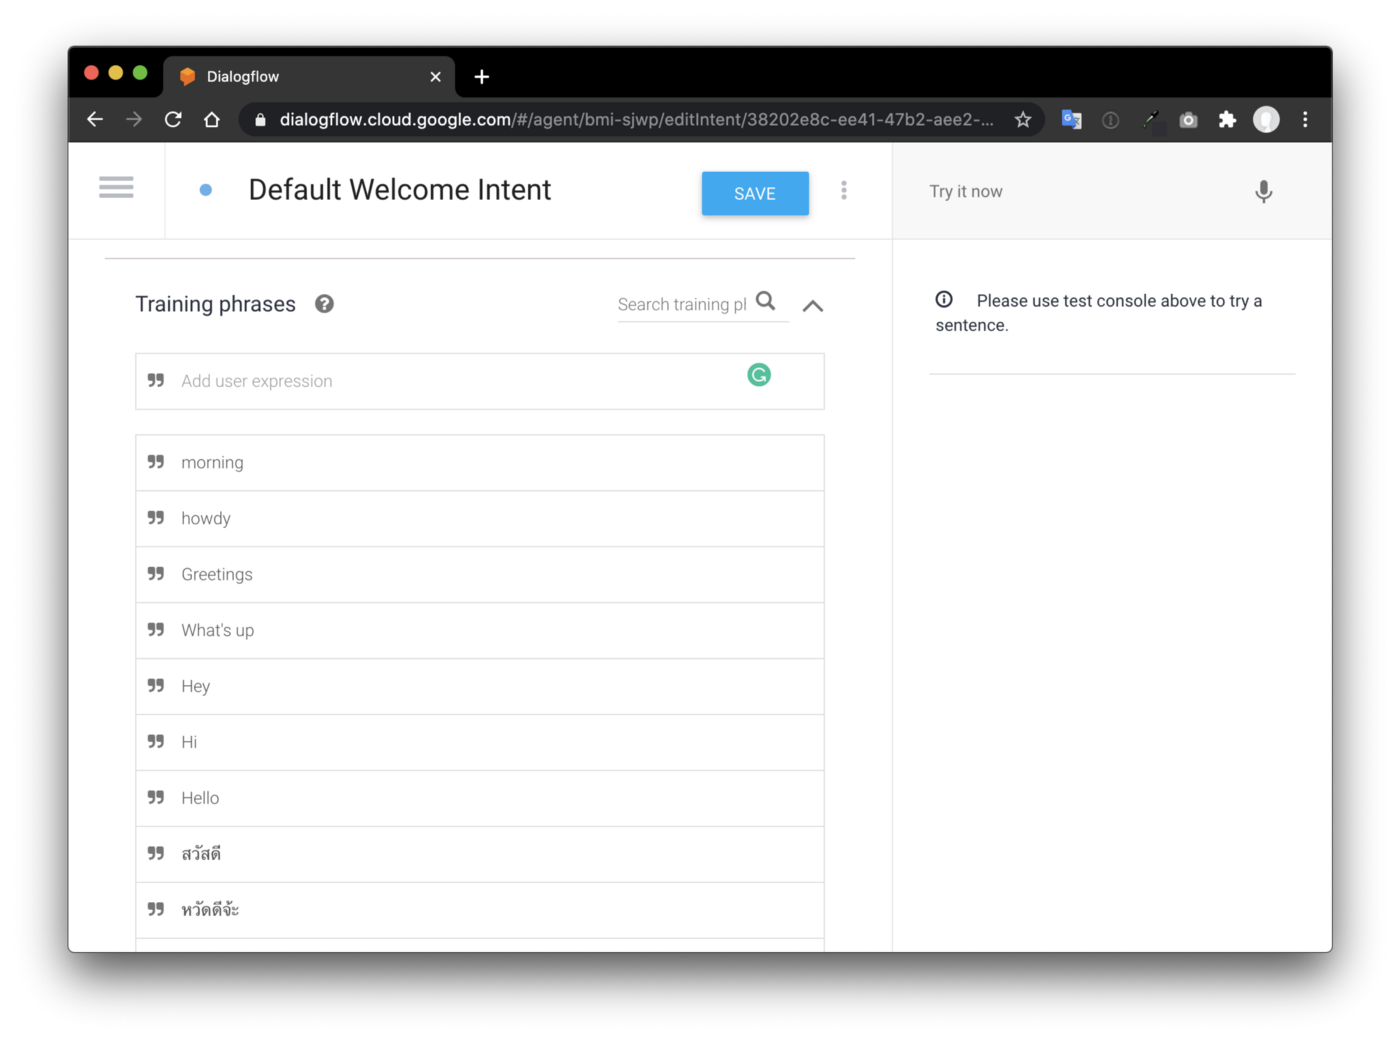
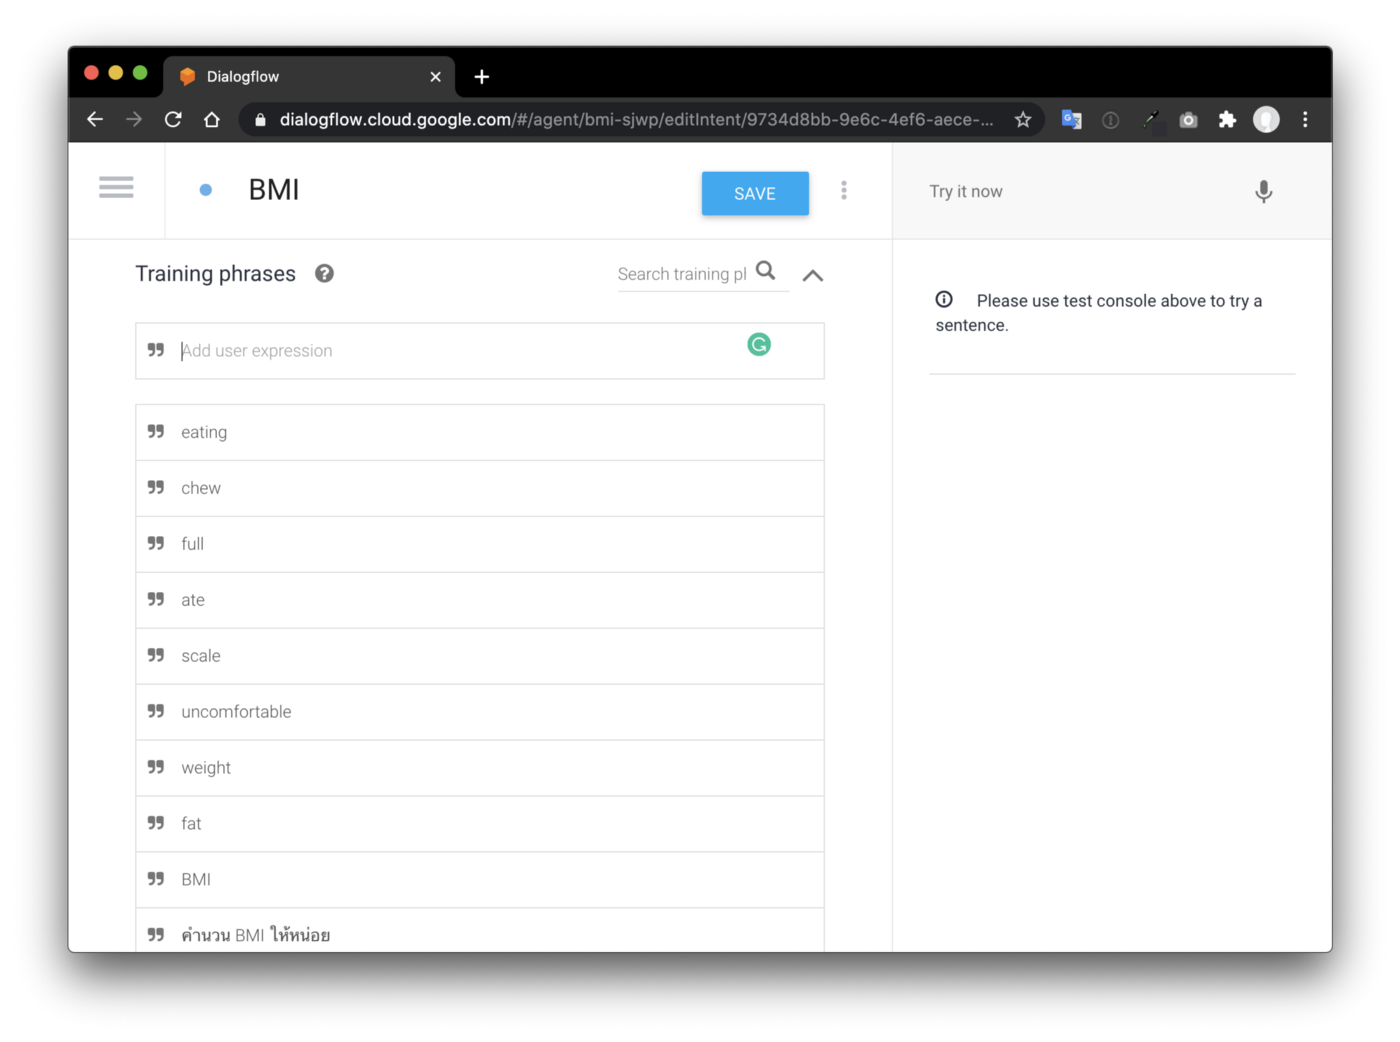
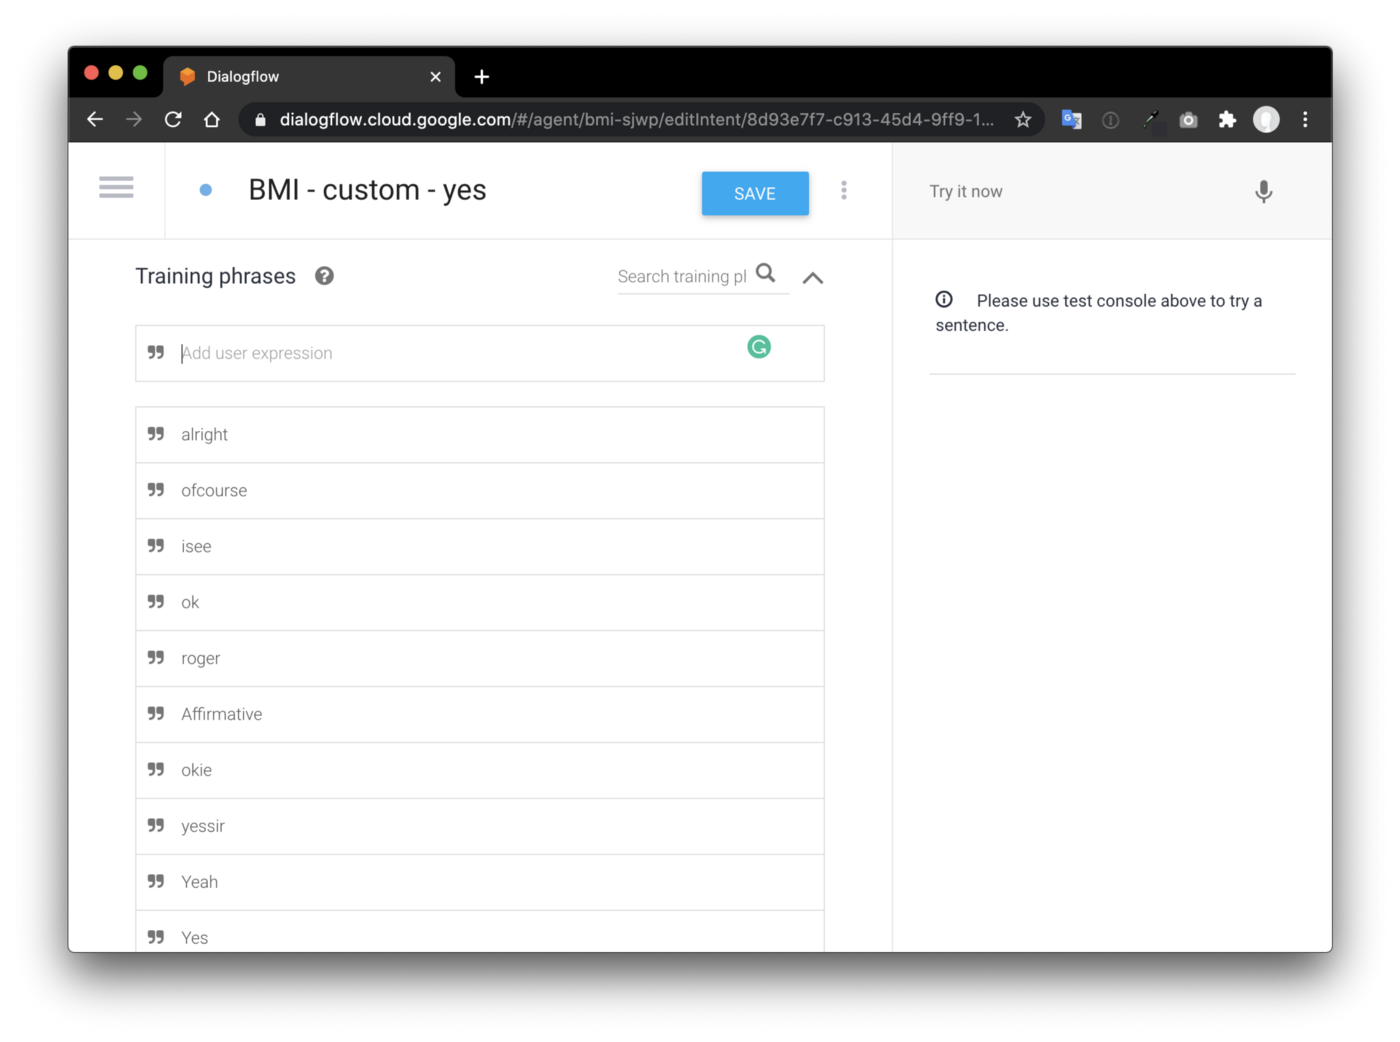
Dialogflow 的其中一個功能是我們可以輸入每個 Intent 的句子,因為我們 BMI Chatbot 輸入都是泰文句子,但是 keywords 裡回應的數值都是英文,因此我們也必須提供更多訓練的詞彙。

5.1 Default Welcome Intent

5.2 BMI Intent

5.3 BMI — custom — yes Intent

Demo

結論

本文提供了一些貼圖的小技巧,透過這些技巧增加了一些功能,讓 Chatbot 透過貼圖(Sticker)類型讓 Chatbot 理解用戶的意圖,歡迎各位參考本篇文章並嘗試各種不同的應用吧:)

Note: Keywords experimental phase - keywords 目前仍處於試驗階段,使用前須注意相關支援度喔!

Reference